
# 一、vue3 组件属性
# 1、组件注册
- vue2
全局注册必须在 vue 实例创建前完成
// 全局注册
Vue.component('my-component-name', {
  /* ... */
})

const vm = new Vue({
  // 根组件
  /* ... */
}).$mount('#app')
- vue3
组件注册在 Vue.createApp 创建的应用实例 app 后完成也可以,并且还可以链式全局注册
const app = Vue.createApp({
  // 根组件
  /* ... */
}).mount('#app')

// 全局注册
app.component('MyComponent', {
  /* ... */
})
# 2、emits 选项
在 vue2 中我们已经知道,子组件中通过$emit 发送一些事件,供其他父组件们调用。
但是当子组件有多个$emit 时:
问题
- $emit 变得难以维护
- 父组件在调用自定义事件时,在子组件中查找不方便;并且使用时自定义事件名没有智能提示
在 vue 3.0 中,提供了一个 emits 选项用来解决上述问题:
<script>
export default {
  name: 'HelloWorld',

  emits: ['getHelloMsgF'],

  data() {
    return {
      msg: 'Welcome to Your Vue.js App'
    }
  },
  methods: {
    sendHelloMsg() {
      // 通过$emit触发,父组件为子组件绑定的自定义事件
      this.$emit('getHelloMsgF', this.msg)
    }
  }
}
</script>
# 3、异步组件
- vue2
<script>
// import Home from './view/HomeView'

export default {
  name: 'App',
  components: {
    // Home
    home: () => import('./view/HomeView')
  }
}
</script>
- vue3
<script>
// import Home from './view/HomeView'

import { defineAsyncComponent } from 'vue'

export default {
  name: 'App',
  components: {
    // Home
    home: defineAsyncComponent(() => import('./components/MyComponent.vue'))
  }
}
</script>
# 4、v-model
v-model 采用了 vue2 中.sync 的思路,使得 vue3 中的 v-model 相较于 vue2 中的 v-model 可以绑定多个属性。
- vue2
<hello-world :count.sync="countF"></hello-world>

<!-- <hello-world :count="countF" @update:count="val => countF = val"></hello-world> -->

<!-- 绑定多个属性 -->
<hello-world :checked.sync="checkedP" :count.sync="countF"></hello-world>
- vue3
当值绑定一个属性时,其默认属性名称为
modelValue
<hello-world v-model="countF"></hello-world>

<!-- <hello-world :modelValue="countF" @update:modelValue="val => countF = val"></hello-world> -->

<!-- 绑定多个属性 -->
<hello-world v-model:checked="checkedP" v-model:count="countF"></hello-world>
vue3.3 新增 defineModel
关于双向绑定的内容,可以先看看:
如果在组件标签上中使用了 v-model,则在该组件中的双向绑定写法在 vue3.3 中可以简化:
- 原来
<!-- BEFORE -->
<script setup>
const props = defineProps(['modelValue'])
const emit = defineEmits(['update:modelValue'])
console.log(props.modelValue)

function onInput(e) {
  emit('update:modelValue', e.target.value)
}
</script>

<template>
  <input :value="modelValue" @input="onInput" />
</template>
- 现在
defineModel 会自动注册一个 prop,并返回一个可以直接变异的 ref
<!-- AFTER -->
<script setup>
const modelValue = defineModel()
console.log(modelValue.value)
</script>

<template>
  <input v-model="modelValue" />
</template>
# 三、新增内置组件
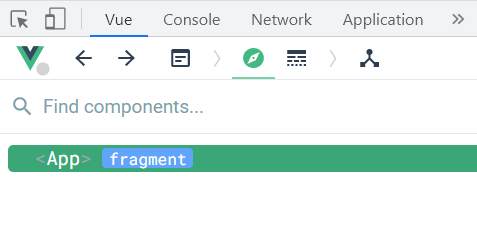
# 1、Fragment 组件
- 在 Vue2 中: 组件必须有一个根标签
- 在 Vue3 中: 组件可以没有根标签, 内部会将多个标签包含在一个 Fragment 虚拟元素中
其作用是:减少标签层级, 减小内存占用
<template>
  <!-- <div> -->
  <h3>App组件</h3>
  <h3>App组件</h3>
  <h3>App组件</h3>
  <!-- </div> -->
</template>
# 2、Teleport (opens new window) 组件
Teleport 是一种能够将我们的组件 html 结构移动到指定位置的技术。
移动的位置可以是:html、body 等等,方便封装一个个性化的弹窗(就不用考虑什么嵌套定位的问题)
使用示例
- 父组件
<template>
  <button id="show-modal" @click="showModal = true">Show Modal</button>

  <Teleport to="body">
    <Demo :show="showModal" @close="showModal = false">
      <template #header>
        <h3>custom header</h3>
      </template>
    </Demo>
  </Teleport>
</template>

<script>
  import Demo from './components/Demo.vue'
  import { ref } from 'vue'

  export default {
    components: {
      Demo
    },
    setup() {
      const showModal = ref(false)

      return { showModal }
    }
  }
</script>
- 子组件
<template>
  <Transition name="dialog">
    <div v-if="show" class="dialog-mask">
      <div class="dialog-container">
        <button @click="$emit('close')">OK</button>
      </div>
    </div>
  </Transition>
</template>

<script>
  export default {
    props: ['show']
  }
</script>

<style>
  .dialog-mask {
    z-index: 999;
    width: 600px;
    height: 300px;
    background-color: rgba(0, 0, 0, 0.5);
    display: flex;
    justify-content: center;
    align-items: center;
  }

  .dialog-container {
    width: 30px;
    padding: 20px;
    background-color: #fff;
  }
</style>
# 3、Suspense (opens new window) 组件
实验性功能
<Suspense> 是一个内置组件,用来在组件树中协调对异步依赖的处理。它让我们可以在组件树上层等待下层的多个嵌套异步依赖项解析完成,并可以在等待时渲染一个加载状态。
使用示例
- 父组件
<template>
  <div class="app">
    <h3>App组件</h3>
    <p>子组件内容如下:</p>

    <Suspense>
      <template #default>
        <Demo></Demo>
      </template>
      <template #fallback>
        <h4>稍等,加载中...</h4>
      </template>
    </Suspense>
  </div>
</template>

<script>
  // 静态引入
  // import Demo from './components/Demo.vue'

  // 动态引入
  import { defineAsyncComponent } from 'vue'
  const Demo = defineAsyncComponent(() => import('./components/Demo.vue'))

  export default {
    name: 'App',
    components: {
      Demo
    }
  }
</script>

<style>
  .app {
    background: gray;
    padding: 20px;
  }
</style>
- 子组件
<template>
  <div class="demo">
    <h3>我是Demo组件</h3>
  </div>
</template>

<script>
  export default {
    async setup() {
      let p = new Promise((resolve, reject) => {
        setTimeout(() => {
          resolve()
        }, 3000)
      })

      return await p
    }
  }
</script>

<style>
  .demo {
    background: skyblue;
    padding: 20px;
  }
</style>