
# 前后端分离
# 一、Swagger + Knife4j 方式
参考文档:
https://cloud.tencent.com/developer/article/1643013
官网:
# 1、Swagger 配置
① 添加依赖
<dependencies>
  <!-- 1、swagger依赖 -->
  <!-- https://mvnrepository.com/artifact/io.springfox/springfox-swagger2 -->
  <dependency>
    <groupId>io.springfox</groupId>
    <artifactId>springfox-swagger2</artifactId>
    <version>2.9.2</version>
  </dependency>

  <!-- https://mvnrepository.com/artifact/io.springfox/springfox-swagger-ui -->
  <dependency>
    <groupId>io.springfox</groupId>
    <artifactId>springfox-swagger-ui</artifactId>
    <version>2.9.2</version>
  </dependency>

  <!-- knife4j依赖 -->
  <dependency>
    <groupId>com.github.xiaoymin</groupId>
    <artifactId>knife4j-spring-boot-starter</artifactId>
    <version>2.0.4</version>
  </dependency>
</dependencies>
② 编写 swaggerConfig 文件配置:
package com.mobai.swagger.config;
import org.springframework.context.annotation.Bean;
import org.springframework.context.annotation.Configuration;
import springfox.documentation.service.ApiInfo;
import springfox.documentation.service.Contact;
import springfox.documentation.spi.DocumentationType;
import springfox.documentation.spring.web.plugins.Docket;
import springfox.documentation.swagger2.annotations.EnableSwagger2;
import java.util.ArrayList;
/**
* Software:IntelliJ IDEA 2020.1 x64
* Author: lencamo
* Date: 2022/6/11 13:33
* ClassName:SwaggerConfig
* 类描述: Swagger配置类
*/
@Configuration // 标识配置类
@EnableKnife4j // 开启Knife4j
@EnableSwagger2 // 开启Swagger
public class SwaggerConfig {
/**
* 配置了Swagger的Docket的Bean实例
*
* @return
*/
@Bean
public Docket docket() {
return new Docket(DocumentationType.SWAGGER_2).apiInfo(apiInfo());
}
/**
* 配置Swagger信息
*
* @return
*/
private ApiInfo apiInfo() {
// 配置作者信息
Contact contact = new Contact("墨白",
"https://www.mobaijun.com",
"mobaijun8@163.com");
// 配置API文档标题
return new ApiInfo("框架师Api",
// API文档描述
"Api Documentation",
// API版本号
"1.0",
// 配置URL(公司官网/blog地址)
"https://www.mobaijun.com",
// 作者信息
contact,
// 以下内容默认即可
"Apache 2.0",
"http://www.apache.org/licenses/LICENSE-2.0",
new ArrayList());
}
/**
* 配置了Swagger的Docket的Bean实例
*
* @return
*/
@Bean
public Docket docket() {
// 设置要显示的Swagger环境
Profiles profiles = Profiles.of("dev", "test");
// 通过environment.acceptsProfiles();判断自己是否在自己设定换的环境当中
boolean flag = environment.acceptsProfiles(profiles);
return new Docket(DocumentationType.SWAGGER_2)
.apiInfo(apiInfo())
// 配置分组
.groupName("2022开发小组")
// 配置Swagger是否启动,默认:true
.enable(false)
// 配置扫描接口
.select()
/*
*RequestHandlerSelectors,配置要扫描接口的方式
* 参数说明:
* basePackage:基于包扫描
* class:基于类扫描
* any():扫描全部
* none():全部都不扫描
* withMethodAnnotation:通过方法的注解扫描
* // withMethodAnnotation(GetMapping.class))
* withClassAnnotation:通过类的注解扫描
*/
.apis(RequestHandlerSelectors.basePackage("com.mobai.swagger.controller"))
// .paths()过滤,不扫描哪些接口
.paths(PathSelectors.any())
.build();
}
}
# 2、Swagger 常用注解
Swagger 常用注解
- @ApiModel("注释"):实体类添加注释
- @ApiModelProperty("注释"):给实体类属性添加注释
- @ApiOperation("注释"):给接口(Controller)方法添加注释,放在方法上
- @ApiParam(""):给方法的参数添加注释
- @Api(""):给类添加注释
# 3、访问地址
默认地址:
http://localhost:8080/swagger-ui.html
# 二、ApiDoc 方式
ApiDoc 是一个和 swagger 类似的 Api 文档生成工具。
apidoc 是一个简单的 RESTful API 文档生成工具,它能从代码注释中提取特定格式的内容生成文档,并且支持大部分的开发语言。
# 1、安装配置
① 安装:
包
npm i apidoc -g
② 配置
- 新建 apidoc.json(项目根目录)
{
  "version": "1.0.0", // 默认版本
  "name": "example", // 接口文档名称
  "description": "apiDoc basic example", // 接口文档描述
  "title": "Custom apiDoc browser title", // 浏览器的title
  "url": "https://api.github.com/v1" // 文档api路径前缀
}
或者
- package.json
{
  "version": "1.0.0", // 默认版本
  "name": "example", // 接口文档名称
  "description": "apiDoc basic example", // 接口文档描述
  "apidoc": {
    "title": "Custom apiDoc browser title", // 浏览器的title
    "url": "https://api.github.com/v1" // 文档api路径前缀
  }
}
更多配置查看官网:https://apidocjs.com/ 的 Configuration (apidoc.json)部分
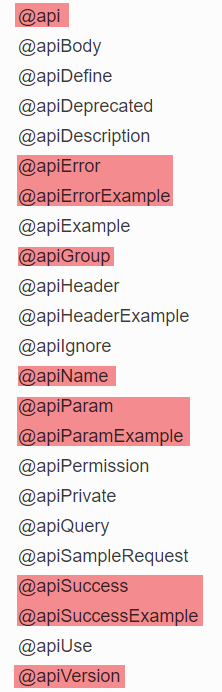
③ 编写注释
详见(2、使用)
④ 生成文档
apidoc -i .\routes\ -o .\apidoc
# 2、使用
① vscode 插件
- ApiDoc Snippets (自动生成注释)
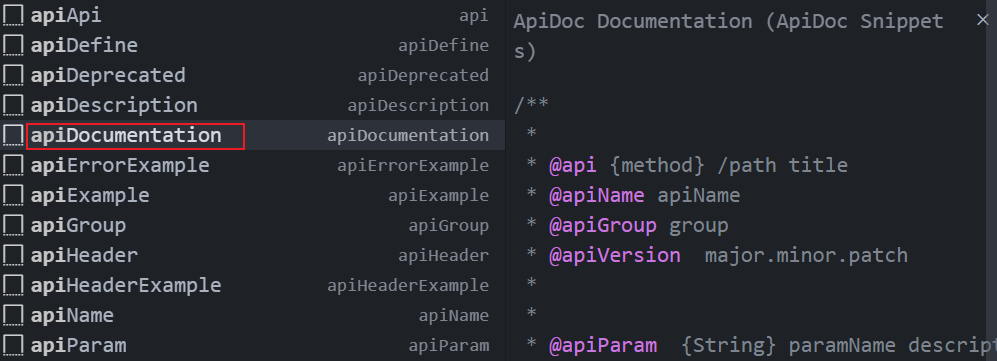
apidoc 配置中文参考 (opens new window)
② vscode 自定义模板
设置 ——> 配置用户代码片段 ——> 输入 JavaScript ——编写:
- javascript.json
{
  "Print to port": {
    "prefix": "apidoc", //快捷名称
    "body": [
      //模板内容
      "/**",
      " * ",
      " * @api {method} /path title",
      " * @apiName apiName",
      " * @apiGroup group",
      " * @apiVersion  major.minor.patch",
      " * ",
      " * ",
      " * @apiParam  {String} paramName description",
      " * ",
      " * @apiParamExample  {type} Request-Example:",
      " * {",
      " *     property : value",
      " * }",
      " * ",
      " * ",
      " * @apiSuccess (200) {type} name description",
      " * ",
      " * @apiSuccessExample {type} Success-Response:",
      " * {",
      " *     property : value",
      " * }",
      " * ",
      " * ",
      " */"
    ],
    "description": "apidoc接口文档注释" //简介说明
  }
}
# 三、ShowDoc + RunApi 方式
首先要注册一个 ShowDoc 账号。使用较为简单,不做介绍。然后下载 RunApi,并登陆 ShowDoc 账号。
这样自己在 RunApi 中发起的一些请求,就会自动编写为 API 文档并同步到 ShowDoc 中。
# 四、ApiFox 方式
谁用过谁知道,是真的香。
← - MVC架构